Updating your email address on LinkedIn might seem like a tiny detail—but it can make a huge difference in how recruiters, clients, and colleagues reach you. Whether you’ve switched jobs, want to separate personal and professional messages, or simply need a more secure login method, learning how to change email on LinkedIn is essential for keeping your account accessible and up-to-date.
Many users don’t realize how important it is to maintain a valid email in their account settings. If you ever lose access to your current inbox or forget your password, updating your email on time can save your entire profile. This guide explains how to change LinkedIn email step-by-step, plus offers pro tricks to keep your account safe.
Why you should update your LinkedIn email
Keeping your LinkedIn email current isn’t just about convenience—it’s about security, communication, and staying reachable in the professional world.
Better communication with employers and connections
If a recruiter wants to contact you, or if LinkedIn sends you important account notifications, everything goes through your registered email. Using an outdated email means you may miss opportunities or critical alerts.
Stronger account recovery options
Your email is your backup key. If you forget your password, LinkedIn will send a recovery link to your primary email address. Using an inbox you can’t access anymore puts your entire profile at risk.
More professional presentation
Maybe your old email address isn’t exactly…professional (“cooldude1995@…” doesn’t always look great to hiring managers). Updating your email helps keep your online brand aligned with your career goals.
How to change email on LinkedIn: Step-by-step guide
Changing your email on LinkedIn is simple, but many users don’t know where to look. Here’s the exact process using the website version. The steps for the mobile app are almost identical.
Step 1: Log in to your LinkedIn account
Open LinkedIn in your browser and log in as usual. If you’re already signed in, you can move to the next step immediately.
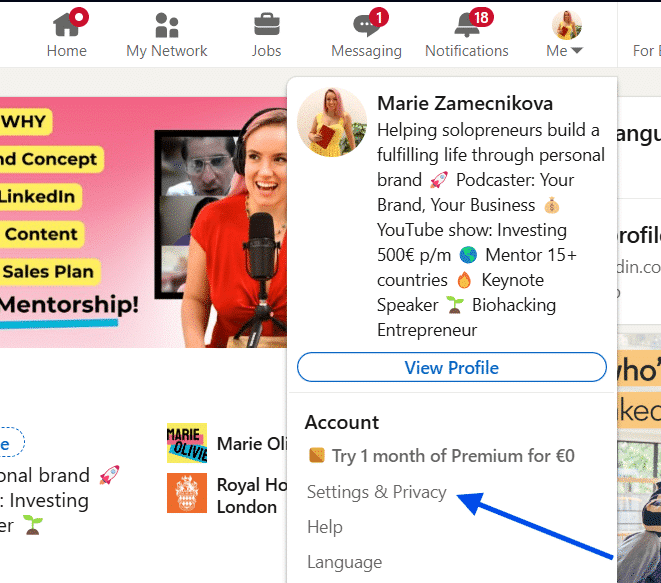
Step 2: Go to “Settings & Privacy”
Click your profile picture in the top-right corner. A small dropdown menu will appear—select Settings & Privacy.
This is the control center for all important LinkedIn adjustments, including login and contact information.
Step 3: Open the “Sign in & security” section
On the left-hand menu, choose Sign in & security. This section manages your password, two-step verification, phone number, and—of course—your email addresses.
Step 4: Find the “Email addresses” option
Scroll or look for Email addresses. Here you’ll see your current primary email and any secondary addresses you’ve added before.

Step 5: Add a new email address
Click Add email address. Enter the new email you want to use. LinkedIn will send you a confirmation link to verify that this email truly belongs to you. Make sure you open your inbox and click the link. Until it’s verified, LinkedIn won’t allow you to set it as your primary email.
Step 6: Set your new email as primary
Once verified, go back to the Email addresses section. Click Make primary next to your new email. This makes it your main login and contact address for all LinkedIn communications.
Step 7: Remove the old email (optional)
If you want to delete your old address, you can do it now. However, LinkedIn requires at least one verified email on your account. Make sure your new email is already set as primary before removing the old one.
Pro tips for managing your LinkedIn email settings
Use a professional email address
Your email is part of your personal brand. A simple [email protected] always looks best.
Keep at least two email addresses connected
This gives you an extra recovery option if you ever lose access to one inbox.
Enable two-step verification
This keeps your account safer, especially if your email gets compromised.
